In this article, you will know how to integrate Kajabi with Cloudptinter.com
To complete the integration process, you need to have an account with Kajabi, Zapier, and Cloudprinter.com (choose your subscription according to the Print Cloud product plan). Log in to all accounts.
Follow these simple steps to connect your Kajabi account to Cloudprinter.com:
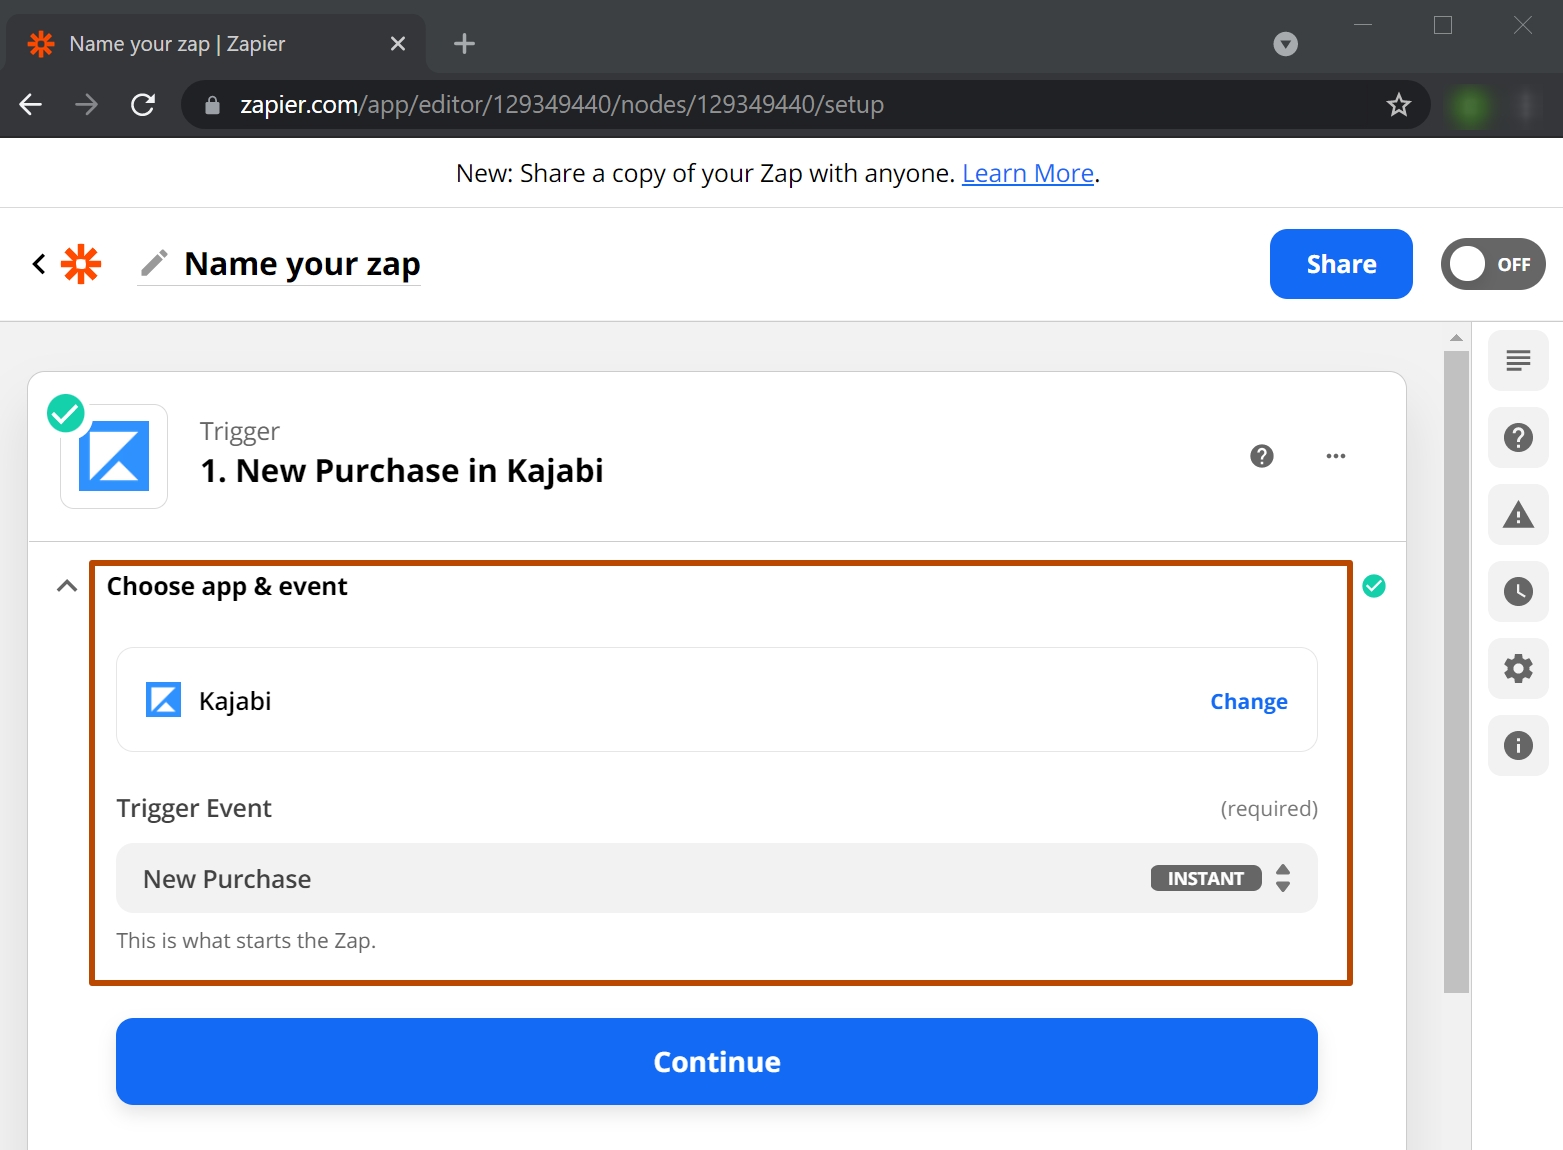
1. Go to Zapier and press Create Zap. Select the app, in this case, Kajabi. Zapier will ask you to sign in to your Kajabi account. After you have written your credentials you can choose the trigger, in this case, “New Purchase”.
2. Now you need to sign in to your account. 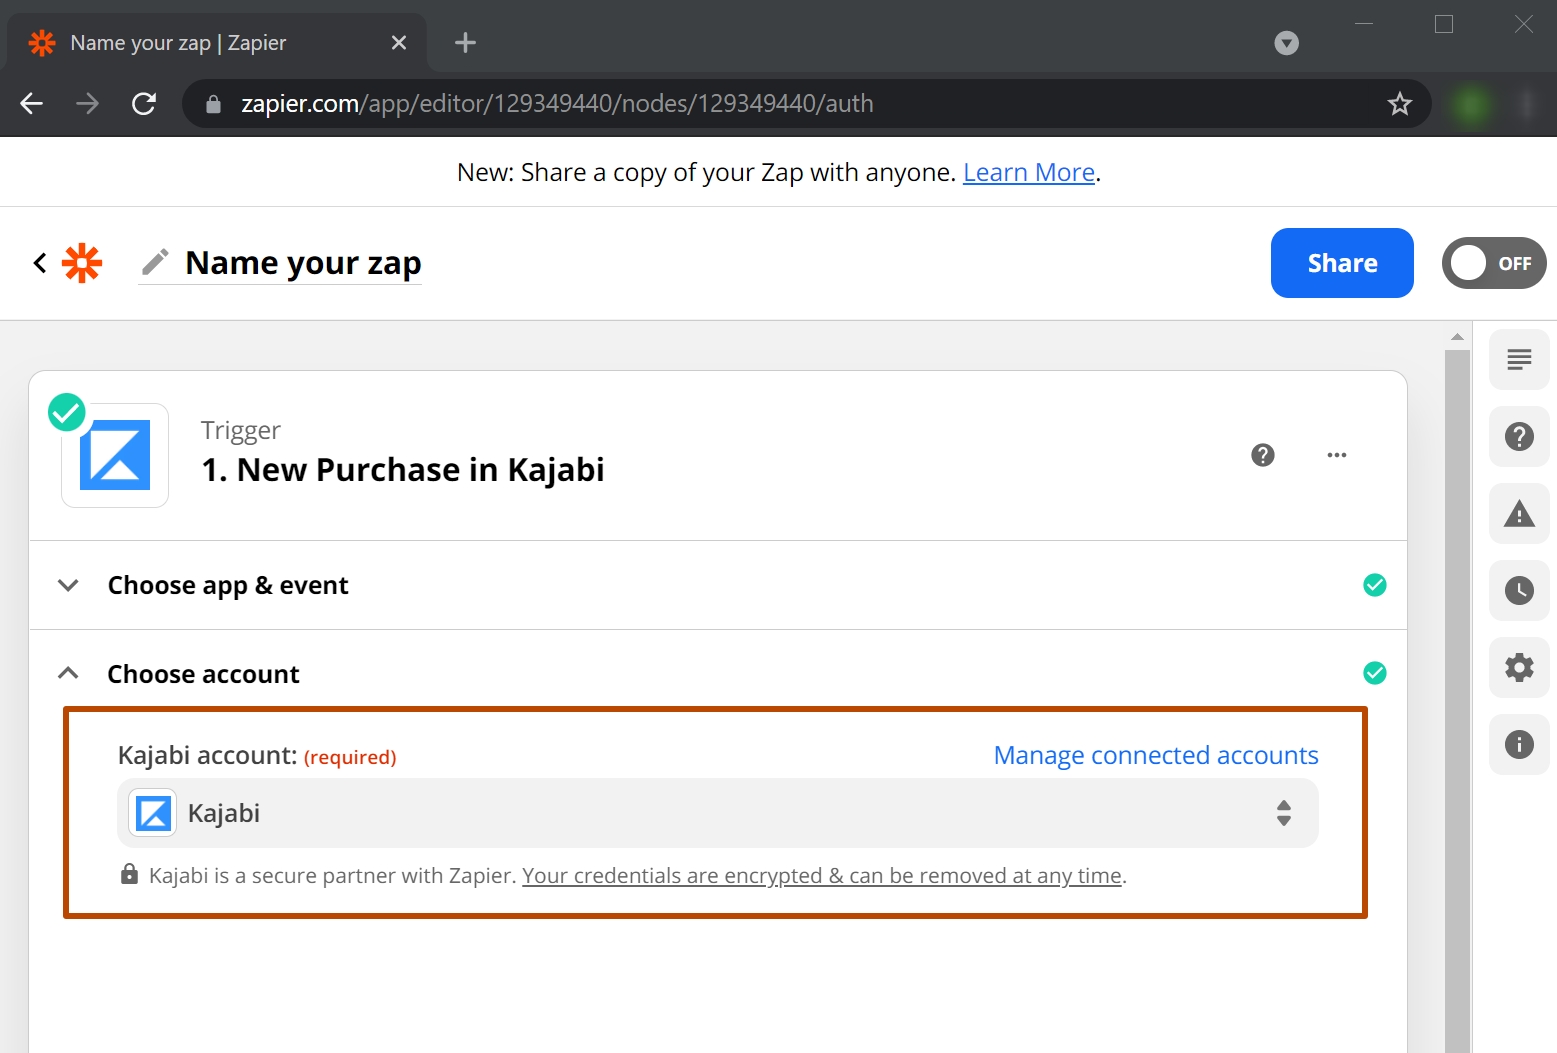
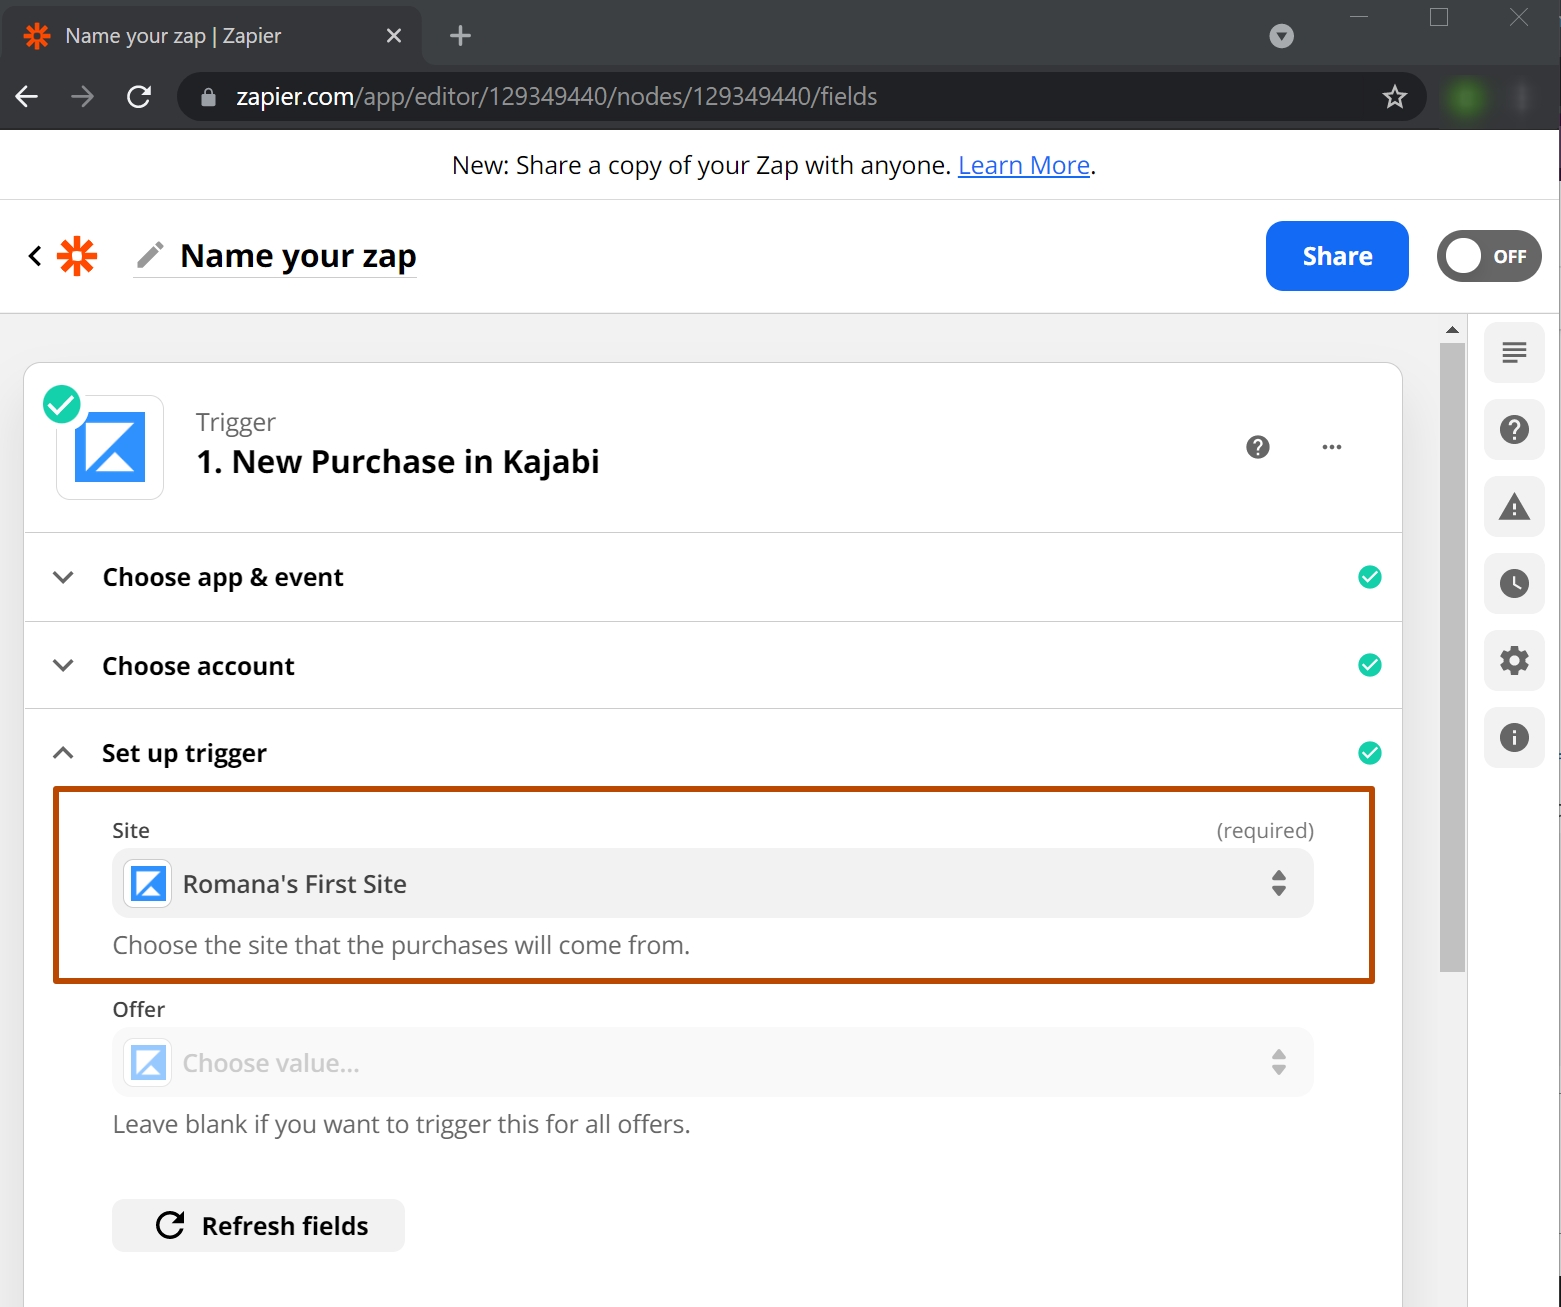
3. The next step requires you to choose the site the purchases will come from.
4. Once you’ve done that, Zapier will test your connection and find previously inputted sample data from your account, which will be used to help you to set up the rest of your workflow. For this, click the “Test Trigger” button. At this point, you can see if everything works correctly. 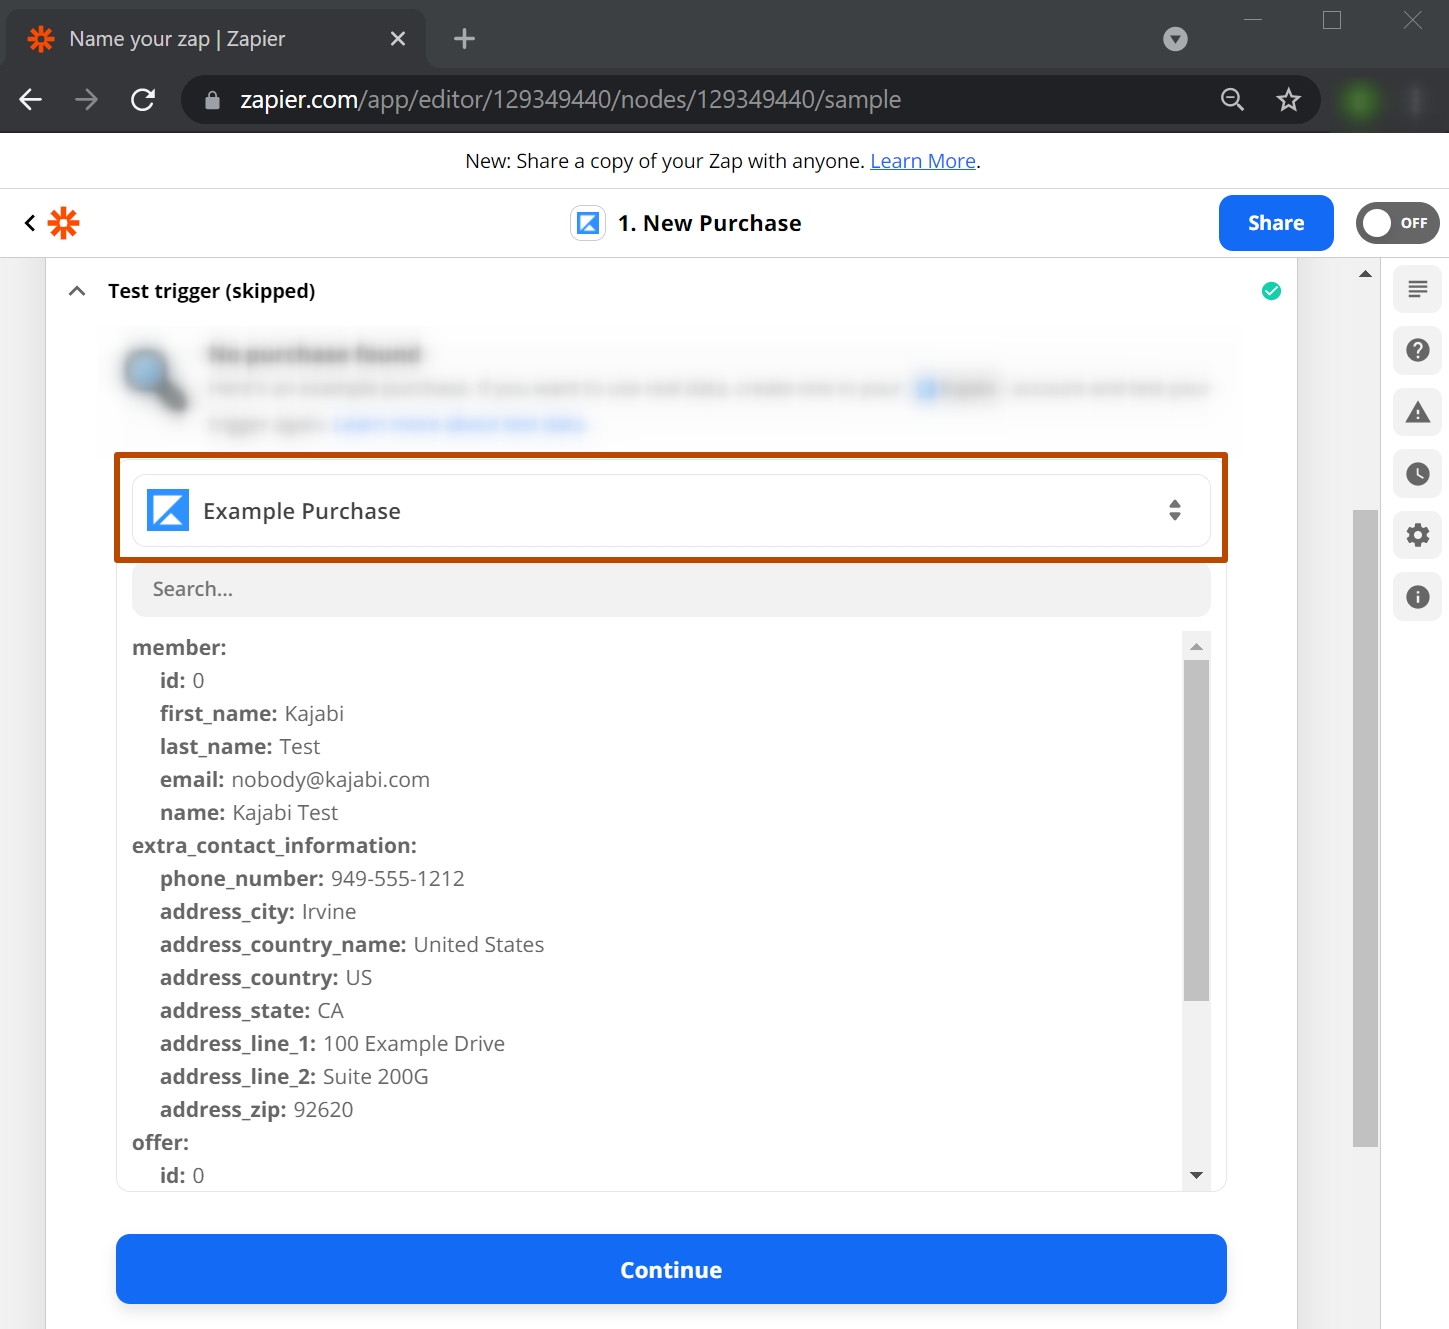
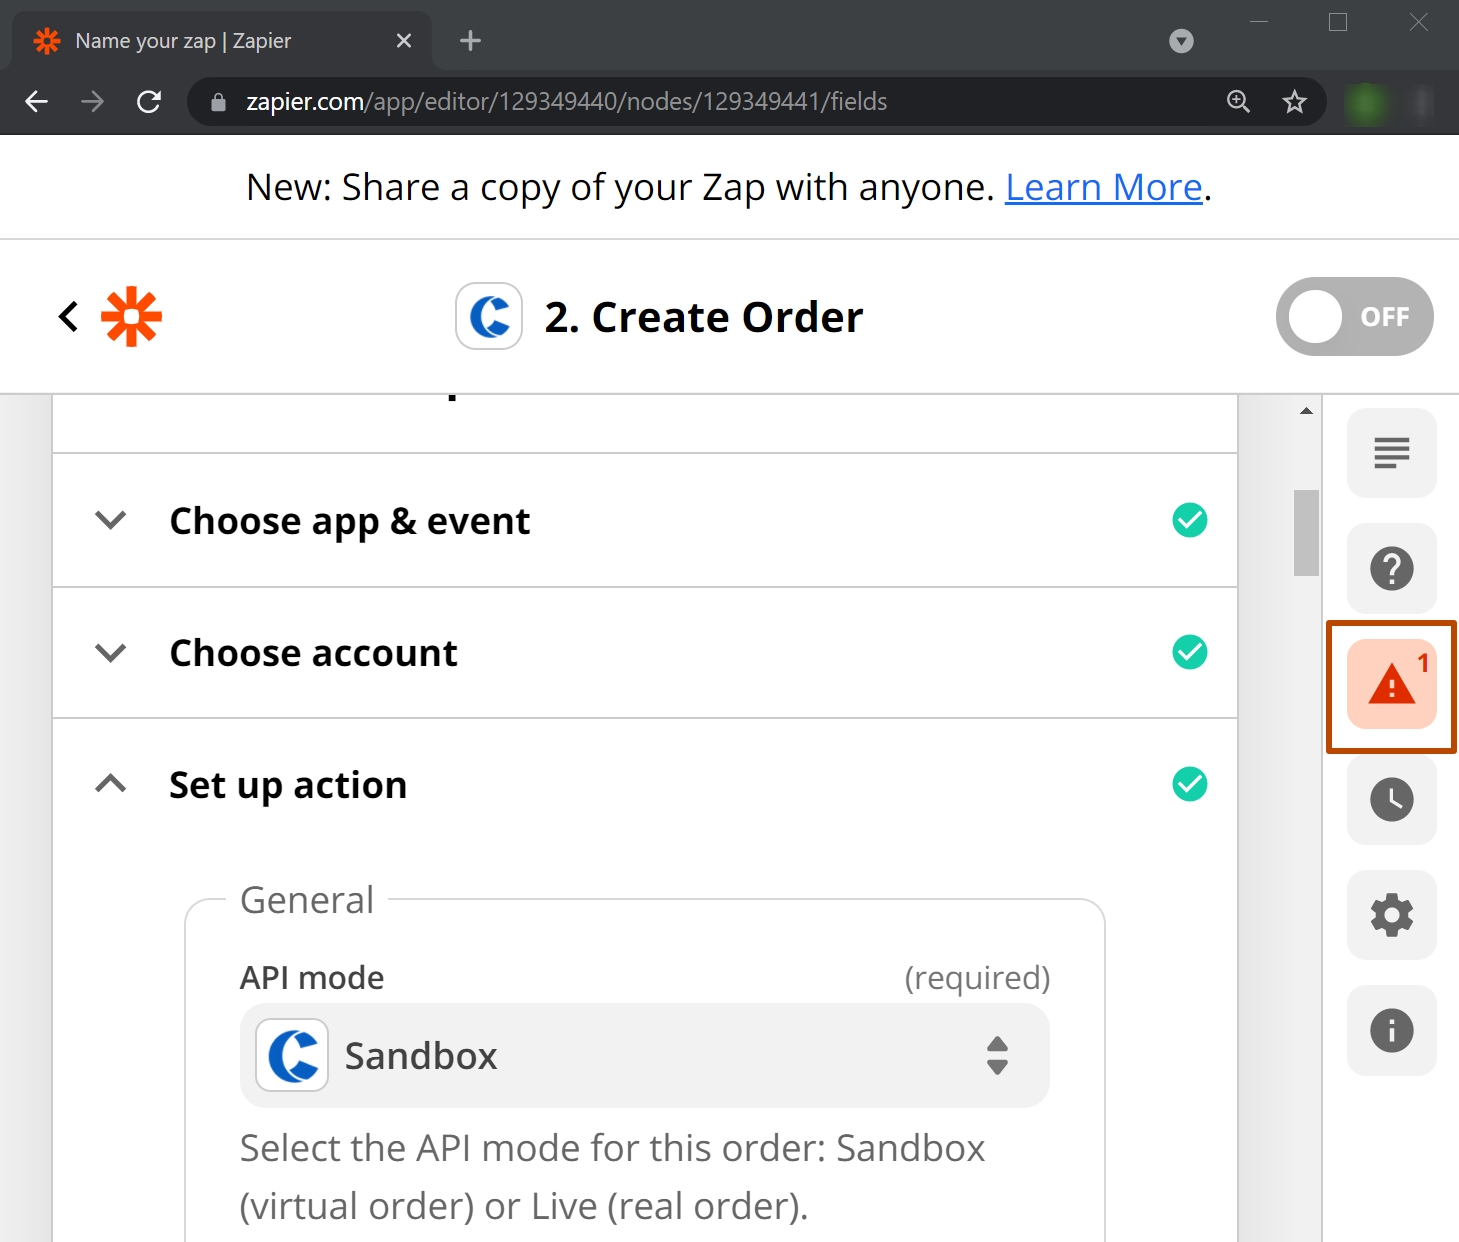
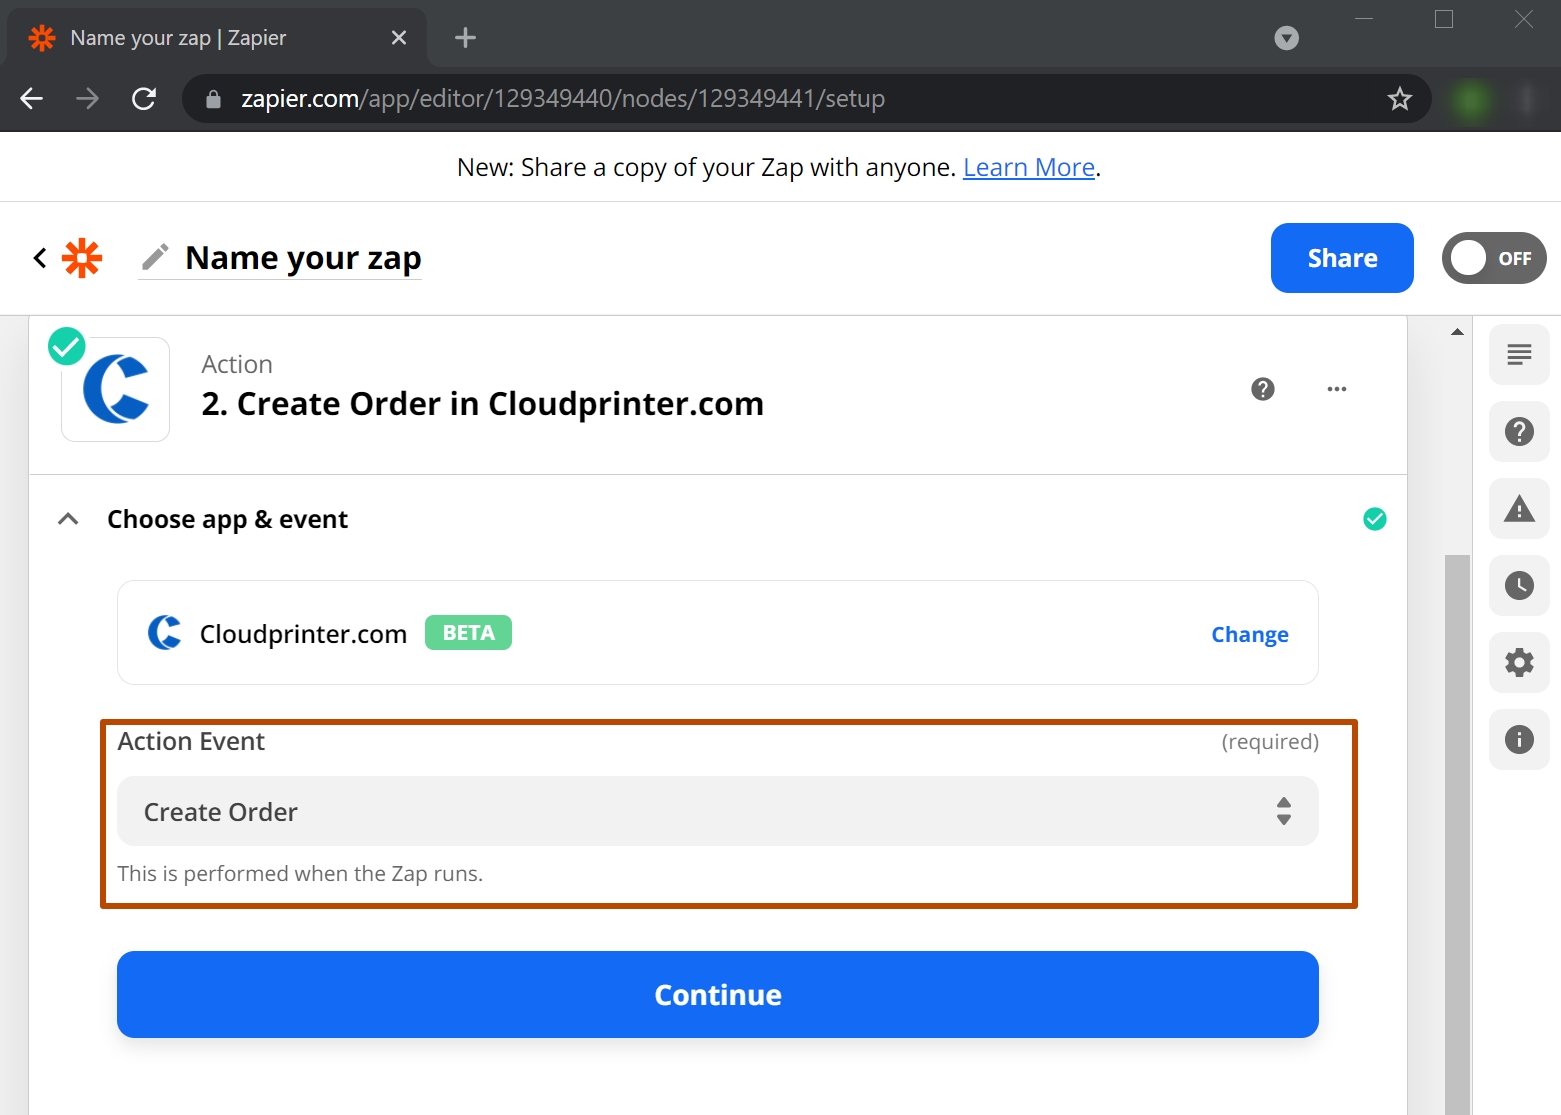
5. After that, you need to set the action that will automatically occur on Cloudprinter.com's side each time a trigger takes place. Select the Action, in this case, “Create Order” and then choose Cloudprinter.com as your action app.
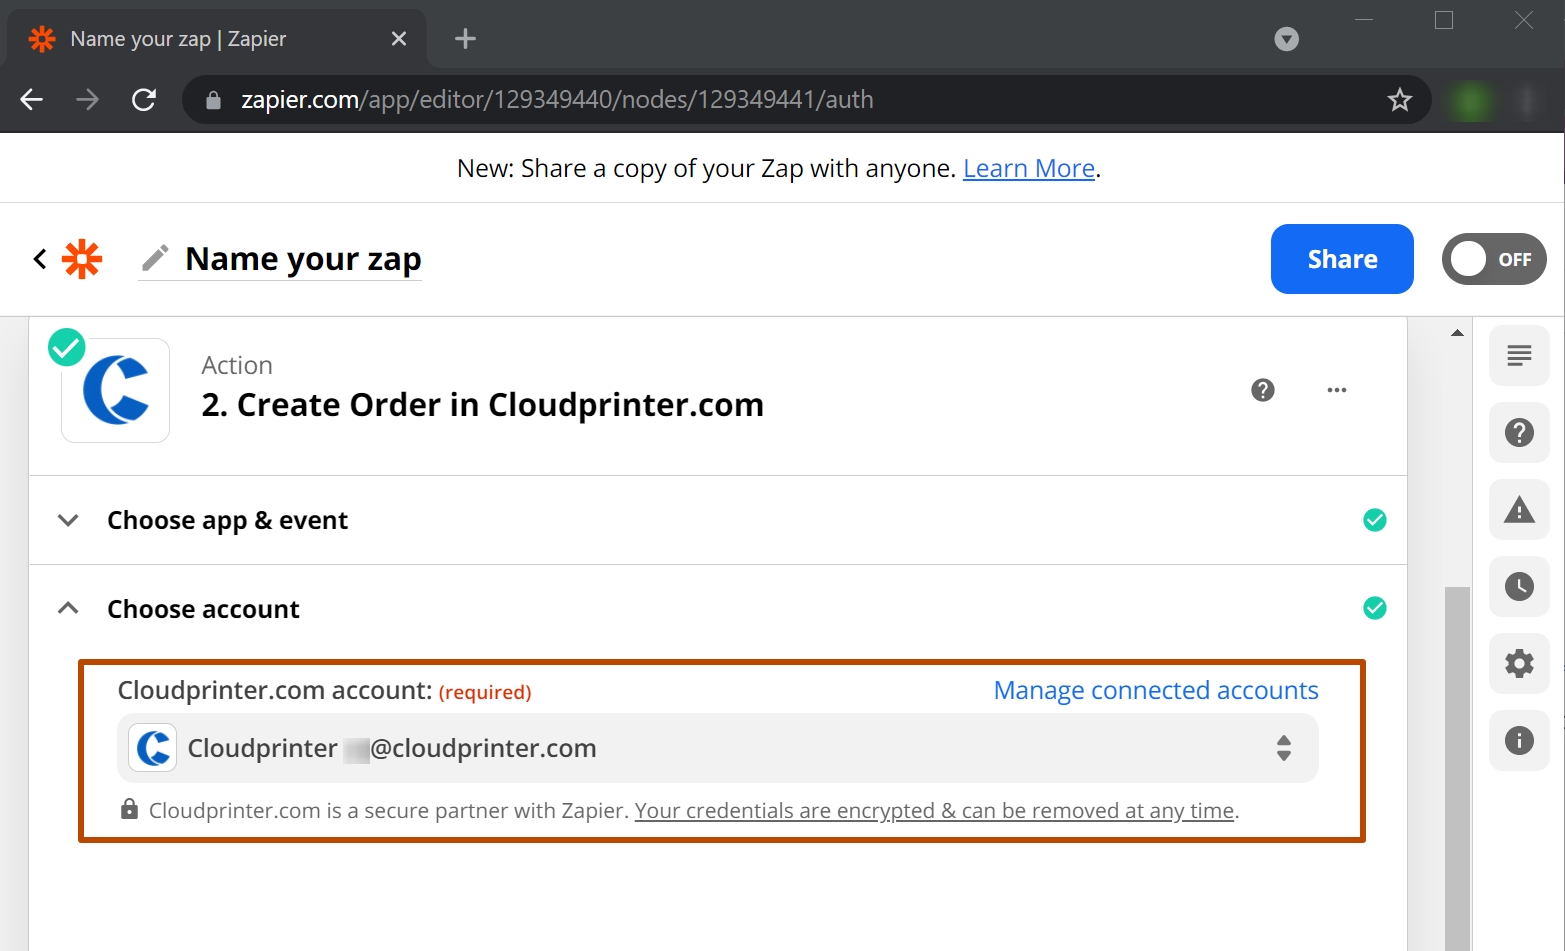
6. Next, you need to choose your Cloudprinter.com account and press the Continue button.
7. Now it's time to set up the action. First, you can either choose “Sandbox” or “Live” mode. With Sandbox mode, you have the opportunity to test your order workflow and it will highlight any problems which need to be fixed. You also need to input your order reference and email (connect these fields with the corresponding fields in Kajabi) that will be used for receiving tracking information.

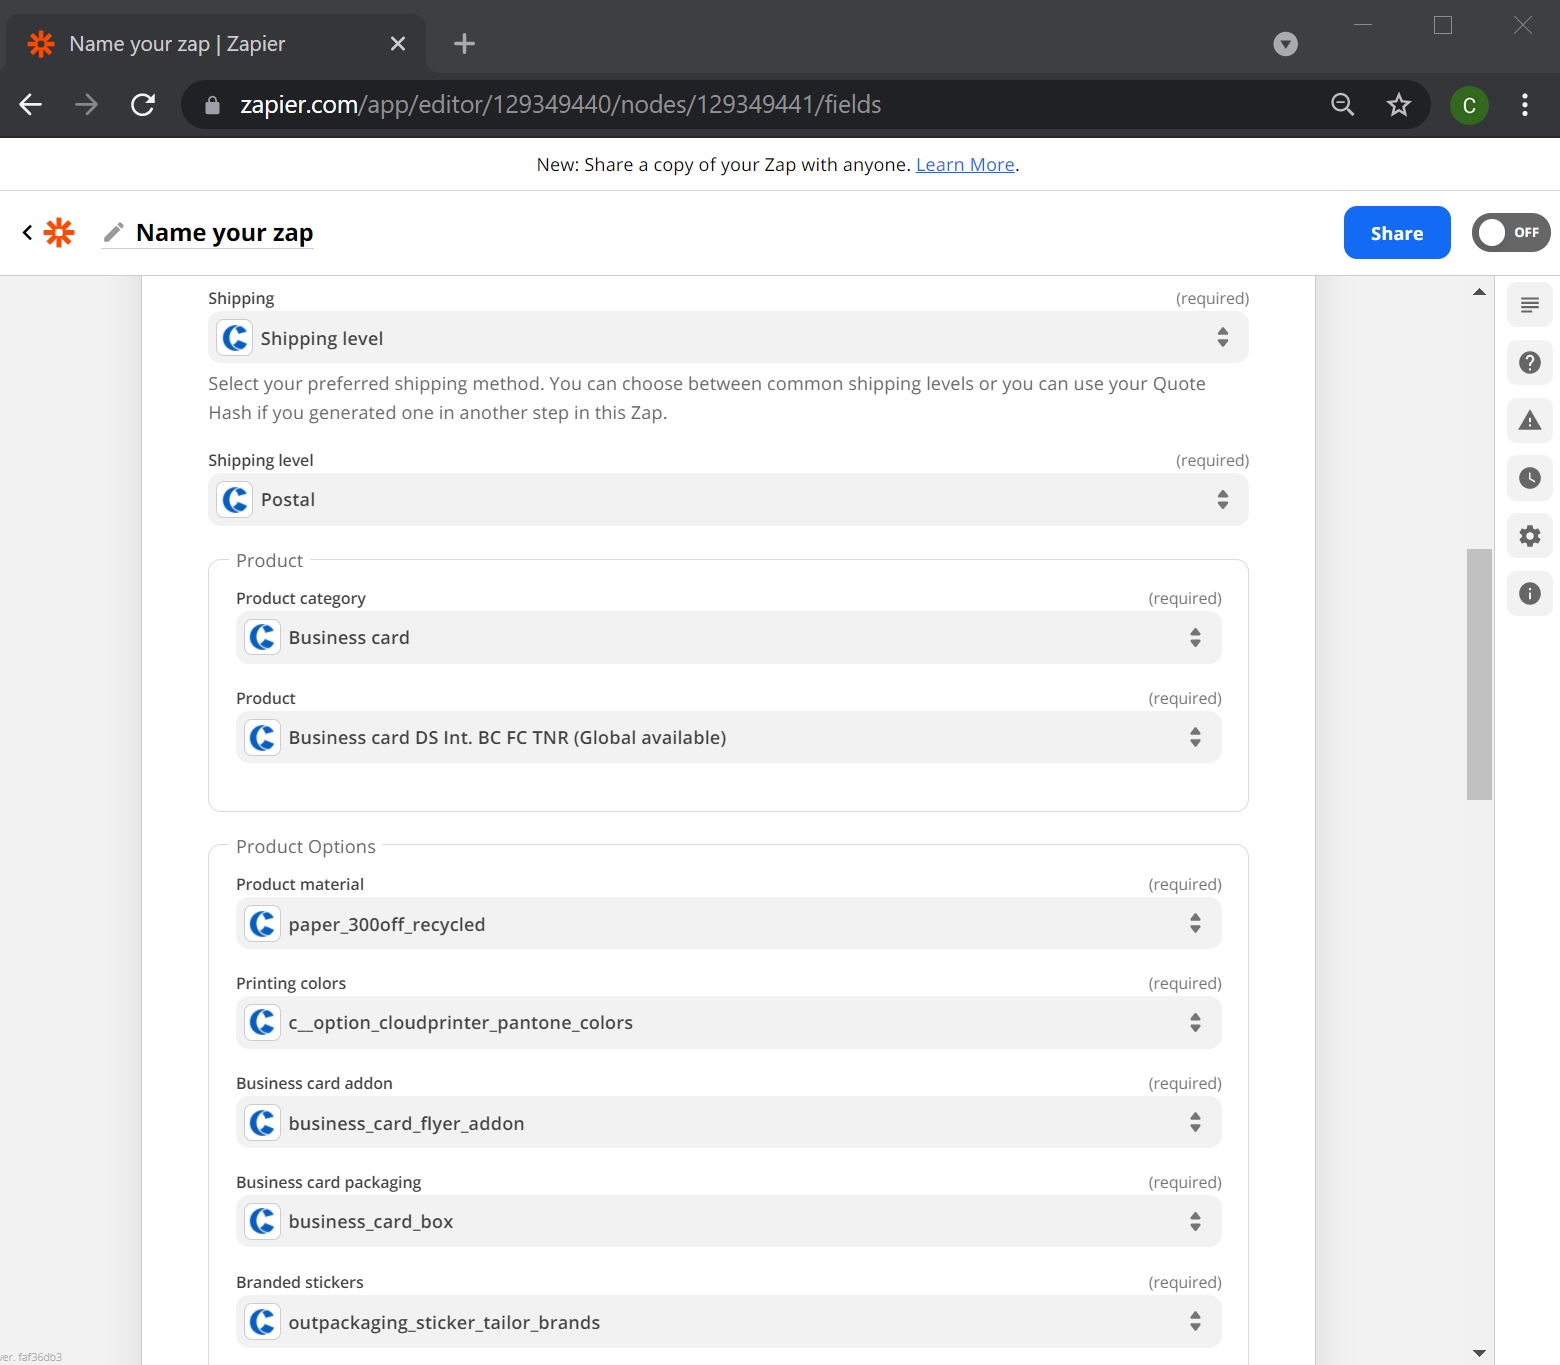
8. Next, choose the preferred shipping option and set up product options.
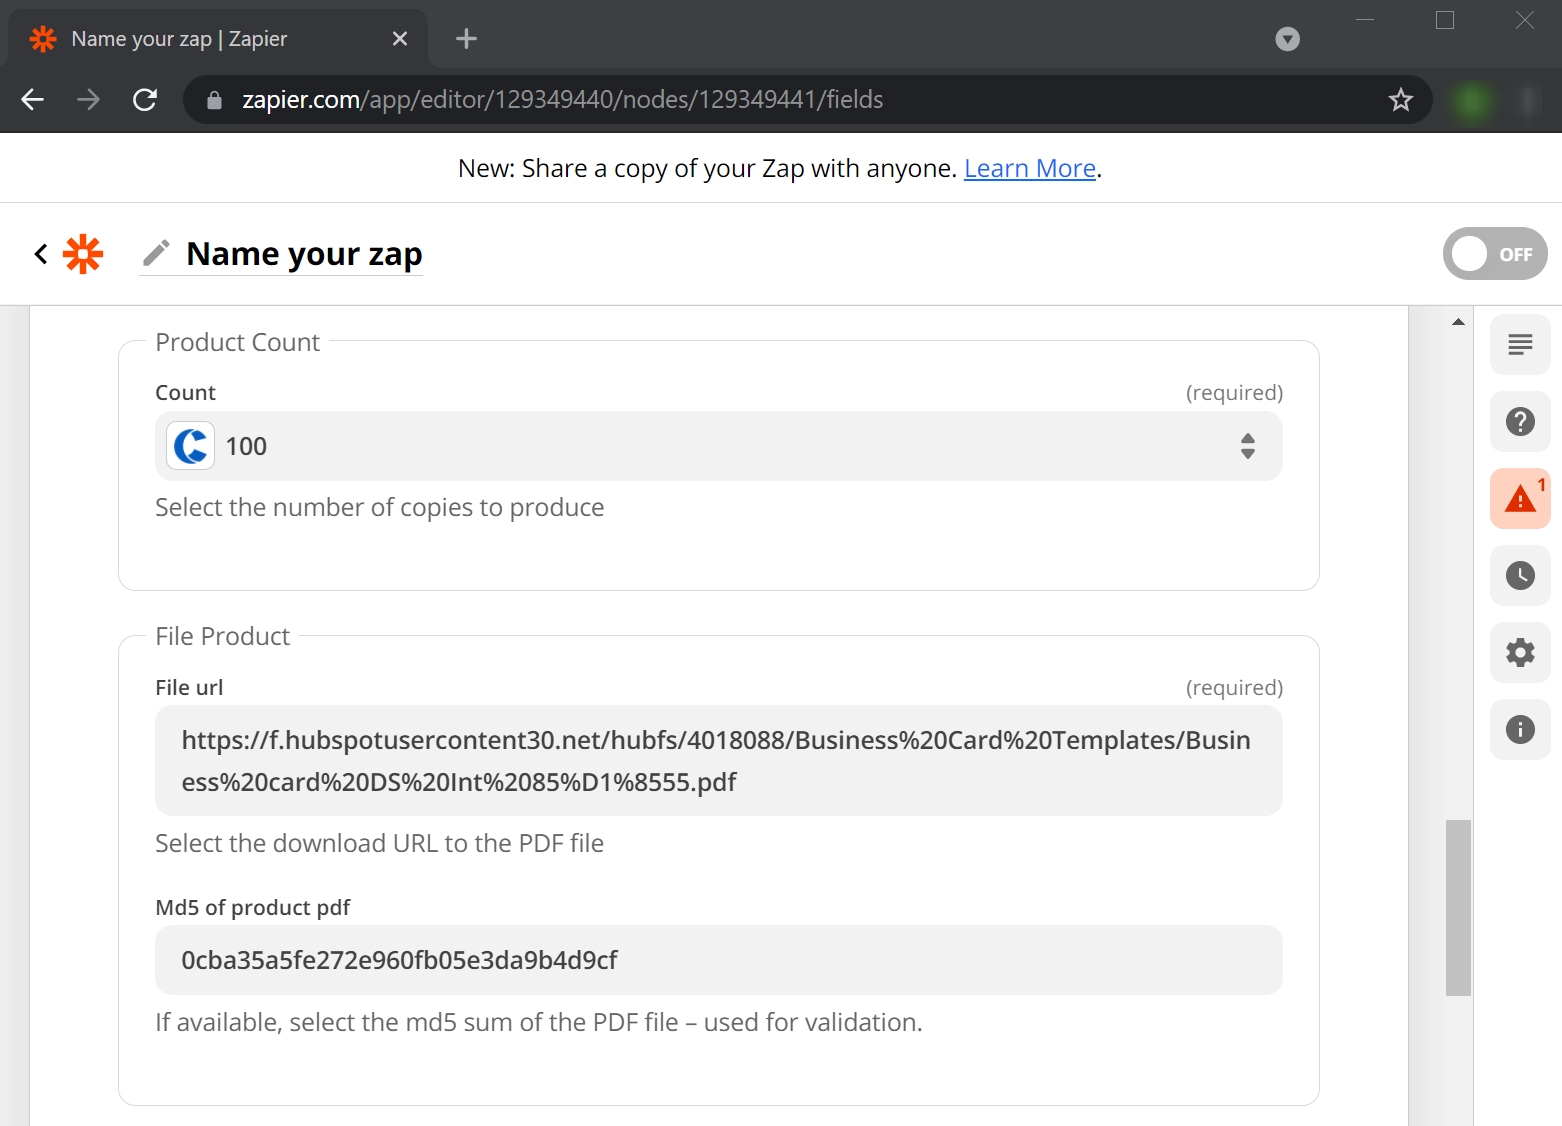
9. At this step, you need to set the quantity and insert the link to your product PDF and MD5 of your product PDF (you can check it online by using the MD5 generator).
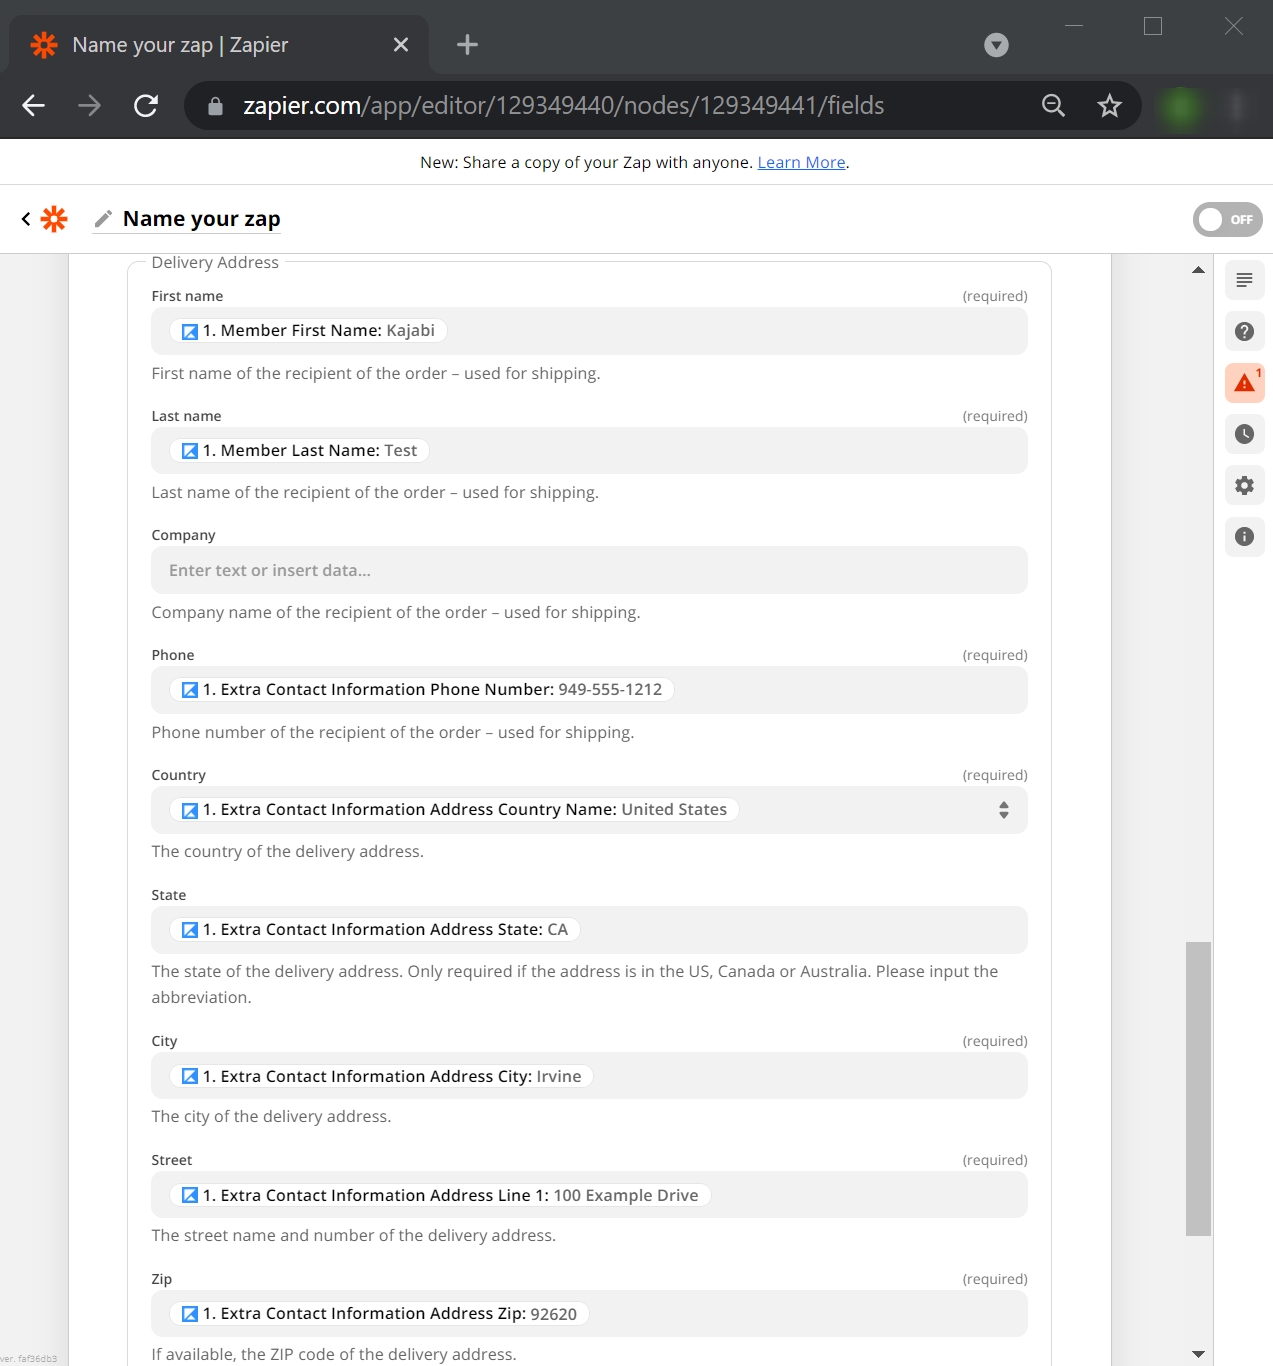
10. Link all fields to the appropriate fields in Kajabi. This information will be used for shipping.
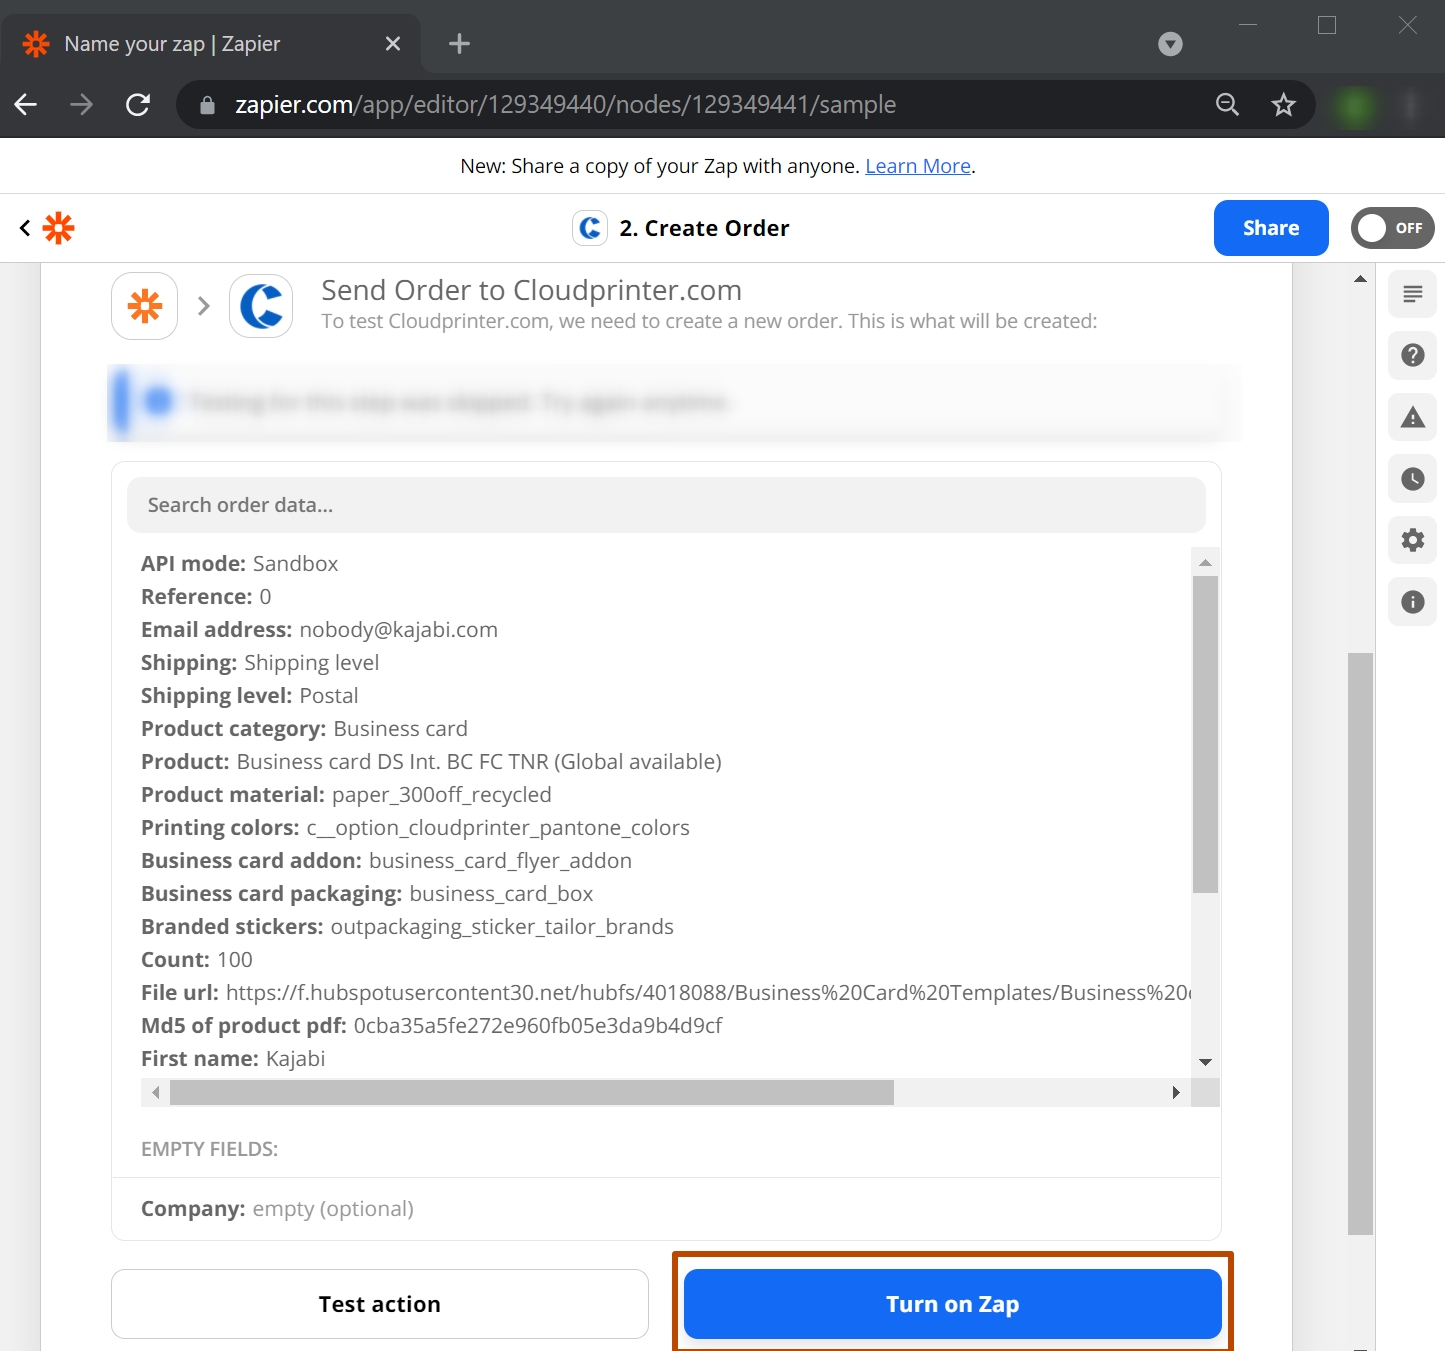
11. Now, you can test the action and continue by pressing the button. After you've tested the Zap, you can activate it by pressing the “Turn on Zap” button.
Now you can complete the same process for each product from your list.
Additional Information:
As you are completing the integration process, an “errors” box may appear to the right of your web page. If this happens, it simply means that an error has occurred or you are missing some data. Until the error is resolved, you will not be able to test the trigger.